Technique To Germinate Okra Seeds
Okra, also known as lady’s finger or gumbo, is a warm-season vegetable that is widely popular in many parts of the world.
This plant thrives in hot and humid conditions and produces pods that are cooked and eaten as a vegetable.
While okra is easy to grow, getting the seeds to germinate can be a bit of a challenge for some gardeners.
If you’re planning on growing okra in your garden this season, it’s important to know how to germinate its seeds properly.
In this article, we will take you through the steps involved in germinating okra seeds using an easy-to-follow technique that guarantees successful results every time.
Okra Germination Mene
Pre-soaking
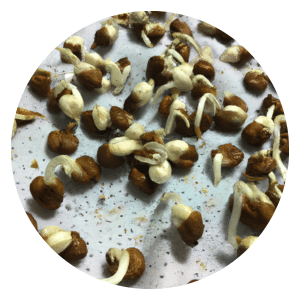
Pre-soaking is a simple technique that can be used to improve the germination rate of okra seeds.
Soaking the seeds in water for 12-24 hours before planting helps to soften the tough seed coat, allowing water to penetrate and enabling the seedling to emerge more easily. This process also helps speed up germination by providing the necessary moisture for the seeds to sprout.
To pre-soak okra seeds, place them in a container filled with clean, room temperature water.
Make sure that all of the seeds are submerged in water and leave them to soak for at least 12 hours or up to 24 hours.
After soaking, remove any floating or damaged seeds and plant them immediately into well-prepared soil.
In addition to increasing germination rates, pre-soaking can also help produce stronger and healthier seedlings.
By softening the outer layer of the seed coat, nutrients from the soil are able to penetrate more easily into the embryo, promoting strong root growth and overall plant development.
So if you’re looking for an easy way to improve your okra yields this season, give pre-soaking a try!
Direct Sowing
Direct sowing is a popular technique for germinating okra seeds.
This method involves planting the seeds directly into the garden bed once the soil temperature reaches 65-85 F (18-29 C) and all frost danger has passed.
It is important to ensure that the soil is well-drained and has a pH level of around 6.0 to 6.5.
When planting okra seeds, it is recommended to space them about 12-18 inches apart in rows that are spaced at least three feet apart. The seeds should be planted about one inch deep, covered with soil, and watered thoroughly.
Direct sowing allows for easy establishment of okra plants as they grow from their natural environment without being disturbed by transplanting.
Additionally, this method saves time and effort as there’s no need to start seedlings indoors or use special equipment like heat mats or grow lights.
Overall, direct sowing can be an efficient way to germinate okra seeds and cultivate healthy plants in your garden bed.
Germination Mat
Using a germination mat is one of the most effective ways to maintain optimal soil temperature for germination.
During the germination process, seeds require a consistent temperature range to sprout and grow successfully.
A germination mat helps in regulating temperature by providing warmth to the seed tray from below. This way, it ensures that the seeds remain at an ideal temperature range and maximizes their chances of sprouting.
Alternatively, you can place your seed tray in a warm location like on top of a fridge or near a heat source like a radiator or heater.
However, this method can be inconsistent because temperatures fluctuate and may not stay within the recommended range for successful seed germination.
Therefore, using a dedicated germination mat is more reliable as it maintains consistent soil temperatures necessary for healthy growth.
Whether you use a germination mat or find another warm location for your seed tray, maintaining optimal soil temperature during seedling development is critical to ensure healthy plant growth.
By implementing these techniques early in your planting season, you increase your chances of success and have healthy plants ready for transplanting when the time comes.
Germinate, oh okra seeds, Push through the soil with ease. Stretch your roots and grow up tall, Soon you'll bear fruit for all. Beneath the sun's warm rays, Each pod will grow in different ways. With time and care, we'll see them thrive, Those okra plants that took root to survive.
Chappy The Gardener
Covering Seeds
Covering the okra seeds with a thin layer of vermiculite or fine soil is an effective way to retain moisture and provide insulation during the germination process.
This technique helps prevent moisture loss and ensures that the seeds stay moist enough for optimal growth. The covering also protects the seeds from harsh temperatures, winds, and any other environmental factors that could hinder their growth.
When choosing what to cover the seed with, it’s essential to use a light material such as vermiculite or fine soil since heavy materials may suffocate the newly sprouted seedlings.
A good rule of thumb when covering seeds is to use no more than twice their diameter in depth.
For example, if your okra seed measures 1/4 inch in diameter, it should be covered with no more than 1/2 inch of vermiculite or fine soil.
Covering okra seeds during germination is essential for optimal growth. It keeps them moist while providing insulation from harsh environmental factors that can hinder their development.
Using light materials such as vermiculite or fine soil ensures proper airflow around the sprouts while preventing suffocation caused by heavier materials like pebbles or stones.
Overall, lightly covering your okra seeds will help you achieve better germination rates and healthier plants in your garden.
Humidity Dome
When it comes to germinating okra seeds, using a humidity dome can be an effective technique.
The humidity dome creates a mini greenhouse effect that helps retain moisture in the seed tray, which is essential for successful germination.
With the right amount of moisture and warmth, the seeds will sprout and grow into healthy plants.
To use a humidity dome, simply place it over the seed tray after planting your okra seeds. Alternatively, you can use plastic wrap to cover the tray if you don’t have a humidity dome.
Just make sure that there is enough space between the top of the soil and the plastic to allow air circulation.
It’s important to monitor your seeds regularly while they are under the humidity dome or plastic wrap.
You should check for signs of mold or excess moisture buildup on a daily basis.
Once your okra plants have sprouted and developed their first set of true leaves, you can remove the humidity dome or plastic wrap and continue with normal care practices such as watering as needed and providing sufficient light.
Bottom Watering
When it comes to germinating okra seeds, one effective technique is bottom watering. This method entails watering the seed tray from the bottom by placing it in a shallow tray filled with water.
By doing so, you prevent dislodging of seeds and ensure that there’s consistent moisture for proper germination.
One essential benefit of this method is that it effectively prevents overwatering, which can be detrimental to seed germination.
Additionally, bottom watering encourages longer roots as they stretch downwards towards the water source.
Therefore, when transplanting, you’ll have stronger plants with healthier roots.
Overall, if you’re looking for an efficient way to germinate okra seeds without any stress or hassle, consider adopting the bottom-watering technique. It’s easy to implement and yields excellent results every time!
Firstly, the bottom-watering technique ensures that the seeds are constantly moist without being oversaturated. This is because the water is drawn up into the soil through capillary action, which prevents any excess water from accumulating and potentially drowning the seeds.
In addition, this method also helps to prevent mold growth on the surface of the soil as it reduces contact between moisture and air.
Secondly, using this technique allows for easy monitoring of moisture levels in the soil.
Simply lift up the container to check if there is still water at the bottom without disturbing or risking damage to any germinating seeds. This makes it an ideal method for beginners who may not be familiar with how much water their plants need.
Overall, adopting a bottom-watering approach when germinating okra seeds can save time and effort while ensuring optimal growing conditions for your plants.
Its simplicity and effectiveness make it a great option for both seasoned gardeners and those new to gardening alike.
With just a little bit of patience and care, you’ll soon have healthy okra seedlings ready for transplanting into your garden!
Adequate Light
Once the okra seeds have germinated, it is essential to provide them with adequate light.
Bright, indirect sunlight or grow lights are recommended for healthy growth and development of the seedlings.
Direct sunlight may be too harsh for young plants and can cause them to wilt or dry out.
If placing seedlings under grow lights, ensure that they are positioned at an appropriate distance from the light source to prevent burning.
A timer can also be set to ensure that the seedlings receive 12-16 hours of light per day.
It is crucial not to overlook this step in the germination process as inadequate lighting can lead to weak, spindly plants with poor growth and yield potential.
Adequate lighting will promote sturdy stem growth, vibrant green leaves, and overall healthy plant development that will help your okra thrive throughout its life cycle.
Thinning
Thinning is an essential step in germinating okra seeds.
Once the seedlings have grown to about 1-2 inches tall, it’s time to evaluate their growth and thin out the weaker ones.
Thinning helps create enough space for the remaining plants to grow and develop, reducing competition for light, water, and nutrients.
To thin out your okra seedlings successfully, start by identifying which ones are weaker than the others.
Look out for those that have shorter stems or fewer leaves than their counterparts.
Use a pair of scissors or small pruners to cut off these weaker seedlings at ground level carefully. Be careful not to disturb the roots of nearby healthy seedlings as you do this.
After thinning your okra seedlings, make sure you keep watering them regularly and add some fertilizer if necessary. This will help promote healthy growth in the remaining plants and ensure they reach maturity quickly.
Remember that overcrowded plants are more susceptible to pests and diseases, so don’t skip this crucial step in germinating your okra seeds!
Transplanting
Once the okra seedlings have developed a few sets of true leaves and the danger of frost has passed, it’s time to transplant them into the garden.
Before transplanting, make sure to prepare the soil by loosening it and adding compost or fertilizer as needed.
It’s also important to water the seedlings well before transplanting.
When transplanting, gently remove each seedling from its container or tray and carefully loosen any tangled roots.
Dig a hole in the prepared soil that is deep enough for the roots to fit comfortably, then place each seedling into its own hole.
Make sure to space them 12-18 inches apart to allow for proper growth.
After planting, water each seedling thoroughly and continue to keep the soil moist as they establish themselves in their new location. With proper care and attention, your okra plants should thrive and produce a bountiful harvest!
In conclusion, germinating okra seeds is an easy and rewarding process.
By following the steps outlined in this article, you can ensure that your okra seeds grow into healthy and productive plants.
Remember to provide your seedlings with plenty of light, water, and nutrients, and to transplant them into a suitable growing location once they have developed a strong root system.
With a little patience and care, you can enjoy a bountiful harvest of fresh okra straight from your garden.
So why not give it a try today?
Your taste buds will thank you!
Click To Grow
Helps Us Grow – Share If You Like


