Mastering Squash Seed Germination: Expert Tips and Methods


Squash seeds are an essential ingredient in gardens all around the world. These versatile seeds can be used to grow a variety of squash types, including butternut, acorn, and spaghetti squash.
Unfortunately, many gardeners struggle to get their squash seeds to germinate properly.
If you’re one of those gardeners who has trouble getting your squash seedlings off the ground, don’t worry!
With a few expert tips and methods, you can master the art of squash seed germination and watch your garden flourish with healthy plants.
In this article, we’ll share proven techniques for successfully germinating your squash seeds and give you everything you need to know to keep your plants thriving all season long.
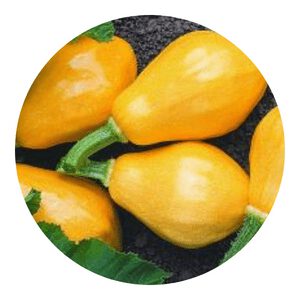
Table of Contents
Choose quality seeds
To achieve a bountiful harvest of squash, it is crucial to use quality seeds from a trusted supplier.
Fresh and high-quality seeds can significantly impact the germination rate and the overall health of your plants.
While it may be tempting to save seeds from the previous season or purchase cheaper ones, it is best to invest in quality ones that are specifically bred for superior performance.
When selecting squash seeds, look for those with a high germination rate, uniform shape and size, and no signs of damage or disease. It is also essential to choose varieties that are well-suited for your growing conditions and desired outcome.
For instance, if you plan on growing squash in containers or limited space, consider bush varieties instead of vining types.
Lastly, always buy from reliable sources that specialize in selling high-quality vegetable seeds. This ensures that you get fresh and viable seed stock that has not been exposed to harmful chemicals or contaminants.
By taking these steps when choosing your squash seeds, you set yourself up for greater success in producing healthy plants with abundant fruits come harvest time.

Start indoors
Starting seeds indoors before transplanting them outdoors is a common practice among gardeners. This method allows the seeds to grow in a controlled environment where they can receive adequate moisture, light, and warmth.
It also helps them develop strong roots and sturdy stems before being exposed to outdoor conditions.
Squash seeds, in particular, benefit from indoor germination as they require warm soil temperatures to sprout.
To begin the process of indoor germination for squash seeds, first choose a container with good drainage holes and fill it with seed-starting mix or potting soil.
Next, sow the seeds 1 inch deep into the soil and cover them lightly with more soil.
Water the soil well but be careful not to overwater as this can cause damping off disease.
Keep the container in a warm place that gets plenty of light such as near a sunny window or under grow lights.
Once the squash seedlings have grown their second set of leaves, they are ready to be transplanted outdoors.
Harden off the seedlings by gradually exposing them to outdoor conditions over several days before planting them in their permanent location.
By starting your squash seeds indoors, you’ll give yourself a head start on your growing season and increase your chances of having healthy plants that produce abundant yields.
Soak the seeds
One effective method for increasing the germination rate of squash seeds is to soak them in warm water before planting.
By softening the seed coat, it becomes easier for the embryo to break through and begin growing. This can be especially helpful for older seeds or those that have been stored for a long period of time.
To soak squash seeds, simply place them in a bowl or jar filled with warm (not hot) water and let them sit for 1-2 hours.
After soaking, drain any remaining water from the container and plant the seeds as normal.
This technique can also be combined with other methods such as scarification (scratching or nicking the seed coat) or stratification (exposing the seeds to cold temperatures) to further increase germination rates.
It is important to note that not all types of squash may respond well to soaking, so it’s best to research specific varieties before attempting this method.
Additionally, over-soaking can lead to mold growth or damage to delicate seedlings, so be sure not to exceed the recommended soak time.
Overall, soaking squash seeds can be a simple yet effective way to promote successful germination and healthy plant growth.
Mastering germination of squash seeds, Requires skills and methods indeed. From choosing the right soil to planting with care, Expert tips ensure success, beyond compare. Watering gently in the morning sun, Let patience grow as the work is done. Once sprouted, watch your squash grow tall, A thriving garden, an achievement for all.
Chappy The Gardener
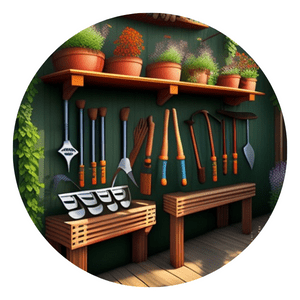
Use seed trays or pots
One of the most important steps in successfully germinating squash seeds is choosing the right container.
Seed trays or small pots are ideal for starting squash seeds since they provide enough space for roots to develop and allow for easy transplanting later on.
When filling your seed trays or pots, make sure to use a well-draining seed-starting mix that is light and fluffy, allowing air and water to move freely through it.
Another benefit of using seed trays or small pots is that they can be easily moved around, allowing you to adjust the amount of light and temperature your seeds receive as needed.
You can also cover them with plastic wrap or a clear dome to create a mini greenhouse environment that helps retain moisture and warmth. This will promote faster germination rates and stronger seedlings.
When choosing your containers, opt for those made from biodegradable materials such as coconut coir or peat pots. These will break down in the soil over time, reducing waste and minimizing root disturbance during transplantation.
Remember to label each container with the variety name so you can keep track of different types of squash as they grow.
By using seed trays or small pots filled with high-quality soil mix, you’ll set yourself up for success when it comes to growing healthy squash plants from seed.
Plant at the right depth
When it comes to planting squash seeds, the depth of planting is a crucial factor for successful germination.
Planting the seeds too shallow or too deep can result in poor germination rates.
It’s important to plant the squash seeds at just the right depth, which is about 1 inch deep into the soil.
Planting squash seeds at this depth ensures that they receive enough moisture from the soil and are protected from harsh weather conditions like wind and hot sun.
Additionally, planting them too deep may make it difficult for them to emerge from the soil while planting them too shallow will expose them to dryness and inadequate light.
By following this simple tip, you can ensure that your squash plants have a healthy start and develop into productive plants that yield plenty of fruits.
Remember that proper seed germination is essential for growing any vegetable successfully, so take care to plant your squash seeds correctly!

Maintain proper moisture
Proper moisture is crucial for successful squash seed germination. The soil should be consistently moist but not waterlogged.
Waterlogging can lead to the development of fungal diseases that can kill the seeds or seedlings.
On the other hand, allowing the soil to dry out can cause the seeds to fail to germinate or die after sprouting.
To maintain proper moisture levels, you may need to water your seeds and seedlings regularly.
Check the soil every day and water when necessary.
Use a watering can with a fine spray nozzle or misting bottle to avoid overwatering or washing away the seeds.
It’s important also to make sure that drainage is adequate in your seed trays, pots, or garden beds.
Poor drainage will cause excess moisture retention in the soil, leading to root rot and other fungal diseases.
If you notice that your soil is becoming soggy despite regular watering, consider adding some perlite, sand, or composted bark fines into it for improved drainage capacity.

Provide warmth
Proper warmth is crucial for the successful germination of squash seeds.
It is recommended to place the seed trays or pots in a warm location with temperatures between 70-85 F (21-29 C). This can be achieved by placing them on top of a heating mat or near a source of gentle heat such as a radiator.
Consistent warmth is key, so it’s essential to monitor the temperature and adjust as needed.
It’s important not to overheat the seeds, as this can cause them to dry out or become damaged.
Keep an eye on the temperature and make sure it remains within the recommended range.
If you don’t have access to a heating mat, you can cover your seed trays with plastic wrap or a humidity dome to trap in moisture and heat. This will create a mini greenhouse effect and help maintain warmth and humidity levels during germination.
By providing your squash seeds with optimal warmth, you’ll give them the best chance at successful germination and healthy growth into mature plants.
Use a heat mat
One of the best ways to ensure successful squash seed germination is by using a heat mat.
A heat mat provides consistent warmth that helps the seeds to sprout faster and more reliably. This is especially important if you are growing your seeds in a cooler environment, such as a basement or garage.
Heat mats come in different sizes and wattages, so it’s important to choose one that fits your needs.
Ideally, you should place the seed trays directly on top of the heat mat, making sure there is good contact between the soil and the mat.
Most heat mats are designed to be left on for several days at a time without overheating or causing any damage.
Using a heat mat can also help you save time and money by reducing the need for supplemental lighting.
When seeds receive consistent warmth from below, they will typically grow stronger and faster than those grown under less optimal conditions.
So if you want to give your squash seeds the best possible start in life, consider investing in a quality heat mat today!
Optimal lighting
When it comes to germinating squash seeds, proper lighting is crucial.
Squash seeds require ample light to germinate, and without it, they may not sprout at all.
If you’re planting your squash seeds indoors before transplanting them outside, you have two options for optimal lighting: a well-lit area or grow lights.
If you choose to place your seed trays in a well-lit area, make sure it receives plenty of natural light throughout the day.
A south-facing window is an excellent option as it provides the most sunlight exposure. However, if your home doesn’t have a sunny spot like this, consider setting up a fluorescent lamp or LED light fixture near your seed trays.
Alternatively, if you don’t have access to natural light or want more control over the intensity and duration of light exposure for your squash seeds, using grow lights is recommended.
Grow lights emit specific wavelengths of light needed for plant growth and are available in various types and sizes depending on your needs and budget.
Regardless of which method you choose for optimal lighting when germinating squash seeds indoors, ensure that there’s sufficient space between the top of the soil and where the grow lights hang above to avoid burning or drying out the young seedlings’ delicate leaves.
Ensure good air circulation
Proper air circulation is essential for healthy seedlings as it helps prevent damping off and fungal diseases.
Damping off is a common fungal disease that affects young seedlings, causing them to wilt and eventually die. This disease thrives in damp and humid environments, making proper air circulation critical to its prevention.
To promote good air movement around the seedlings, it’s advisable to use a small fan. The fan can be placed near the seedlings on low speed or set up on a timer for intermittent bursts of airflow throughout the day.
When using a fan, ensure that it’s not blowing directly at the plants as this may cause damage to their delicate leaves.
In addition to using a fan, you can also improve air circulation by placing your seed trays in an open area with plenty of ventilation.
Avoid overcrowding your plants as this may hinder proper airflow around them.
With good air circulation, your squash seedlings are more likely to thrive and grow into healthy mature plants.

Be patient
One of the most important things to remember when trying to germinate squash seeds is patience.
It can be tempting to constantly check on the seeds and become discouraged if they don’t sprout right away, but it’s important to remember that some varieties may take longer than others.
Additionally, even within a single variety, there may be some seeds that germinate more quickly than others.
To ensure optimal conditions for seed germination, it’s important to keep the soil moist but not overly wet. This can be achieved by misting the soil regularly or covering it with plastic wrap until the seeds have sprouted.
It’s also important to maintain consistent temperatures during this time – ideally around 70-80 degrees Fahrenheit.
If you’ve given your squash seeds plenty of time and still haven’t seen any growth, there are a few troubleshooting steps you can take.
First, make sure that your soil isn’t too compacted or heavy – this can make it difficult for young roots to penetrate through. You should also check your watering habits – if the soil is too dry or too wet, this can prevent germination from occurring.
Finally, consider whether pests or diseases may be causing issues – inspect your plants closely for signs of damage or infestation.
Thin out seedlings
Once your squash seedlings have developed their first set of true leaves, it’s important to thin them out. This means removing some of the plants to allow enough space between them for healthy growth.
When seedlings are too close together, they compete for resources such as light, water, and nutrients. This can lead to stunted growth or even death of some plants.
To thin out your seedlings, carefully remove the weakest and smallest plants from each cluster.
Leave only the healthiest and strongest ones behind. If you’re not sure which ones to keep, choose those with thicker stems and larger leaves.
Aim for a spacing of at least 18 inches between each plant if growing bush varieties or 24-36 inches apart for sprawling varieties like vining squash.
By thinning out your squash seedlings, you’ll give them the best chance at producing a bountiful harvest.
It may seem difficult to remove some of the plants you’ve nurtured from seed, but it’s an essential step in ensuring a successful garden.

Harden off before transplanting
Before transplanting squash seedlings to your garden, it is important to harden them off first.
This process involves gradually introducing the seedlings to outdoor conditions such as increased sunlight and cooler temperatures.
Hardening off helps prevent shock that can occur when transitioning from indoor to outdoor environments.
To begin the hardening off process, start by placing the seedlings outside for a few hours each day in a sheltered location that receives partial sunlight.
Gradually increase their time spent outdoors and exposure to sunlight over several days until they are spending most of the day outside in full sun.
It is also important to gradually expose the seedlings to cooler temperatures at night by bringing them indoors or covering them with a protective cloth during colder evenings.
Once your squash seedlings have been hardened off properly, they will be more resistant to pests and diseases and better able to adapt to their new environment in your garden.
Transplant carefully
Transplanting squash seedlings can be a delicate process, and it is important to handle them with care to avoid damaging the roots.
When removing the seedlings from their containers, be sure to loosen the soil around the roots before gently lifting them out.
Avoid pulling on the stems or leaves as this can cause damage.
Once you have removed your squash seedlings from their containers, it is time to plant them in well-prepared soil.
Make sure that you have dug holes deep enough so that the root systems are fully covered when planted. This will help ensure that they receive enough water and nutrients as they continue to grow.
Finally, water your newly transplanted squash seedlings thoroughly after planting. This will help settle the soil around their roots and provide moisture for growth.
Keep an eye on your plants in the coming days and weeks, making sure to water regularly if rainfall is insufficient.
With proper care during transplanting, your squash plants should thrive and produce a bountiful harvest!

Provide support (optional)
When growing squash, some varieties may benefit from trellising or support to prevent them from sprawling and taking up too much space in your garden.
Squash plants can quickly take over a garden bed if left to their own devices, but using stakes or trellises can help control their growth.
One variety that benefits from trellising is the vining squash. These types of squash produce long vines that can easily climb up a trellis or stake, saving valuable space in your garden.
By training these plants to grow vertically instead of horizontally, you’ll also have an easier time harvesting your crop.
Another reason to consider using stakes or trellises for your squash plants is to improve air circulation around the plant.
When leaves are allowed to touch the ground, they’re more prone to diseases like powdery mildew and rot.
Keeping the foliage off the ground will not only keep it healthy but also make it easier for pollinators like bees and butterflies to access the flowers for fertilization.
In conclusion, mastering squash seed germination requires patience, attention to detail, and a bit of trial and error.
By following expert tips and methods such as proper soil preparation, temperature control, and seed treatment, you can increase your chances of success.
Don’t be discouraged if you encounter setbacks along the way; instead, use them as opportunities to learn and improve your techniques.
With dedication and persistence, you can achieve a bountiful harvest of healthy squash plants.
So go ahead and give it a try – your garden will thank you!
Click To Grow


Helps Us Grow – Share If You Like